One Community
Apiary Open Source Hub
Bees are essential to an abundant and thriving plant culture. We will be open source sharing our experience setting up and maintaining an apiary (also known as a bee yard) as part of One Community’s food infrastructure , open source botanical garden model , and global transformation methodology . This open source hub includes the following sections:
- Related Pages
- Why Build an Apiary
- Everything you Need to Know about Starting Your Own Apiary
- Buying Your Bees
- Building Your Own Langstroth Beehive
- Open Source Content Coming Later
- Resources
- Summary
- FAQ
NOTE: THIS PAGE IS NOT CONSIDERED BY US TO BE A COMPLETE AND USABLE TUTORIAL UNTIL
WE FINISH OUR OWN CONSTRUCTION OF THIS COMPONENT, CONFIRM ALL THE DETAILS, AND ADD
TO THIS PAGE ALL THE RELATED VIDEOS, EXPERIENCE, AND OTHER UPDATES FROM THAT BUILD.
IN THE MEANTIME, YOU CAN HELP US COMPLETE IT ALL SOONER WITH THE FOLLOWING OPTIONS:
INPUT & FEEDBACK | JOIN OUR TEAM | HELP US BUY THE PROPERTY
RELATED PAGES (Click icons for complete pages)


")


")
")
")
")
")
CLICK ICONS BELOW TO JOIN US THROUGH SOCIAL MEDIA


WAYS TO CONTRIBUTE TO EVOLVING THIS SUSTAINABILITY COMPONENT WITH US
SUGGESTIONS • CONSULTING • MEMBERSHIP • OTHER OPTIONS
WHY BUILD AN APIARY
 One Community sees supporting bee populations and helping reverse their decline as an essential part of comprehensive stewardship for The Highest Good of All and our goals for establishing sustainable teacher/demonstration hubs . Also, our food infrastructure will grow to feed hundreds and sufficient pollinators are essential to supporting this. As part of our experience establishing our own apiary, we will open source our setup and maintenance details as part of our comprehensive blueprints for sustainability. We also use this page to link to other quality beekeeping resources we’ve found.
Our primary intentions for establishing an apiary include:
- Supporting bee populations
- On-site honey and wax production
- Promoting community maintained apiaries
- On-site pollinators for our food infrastructure
- Open source sharing our experience in a way that others can easily duplicate

EVERYTHING YOU NEED TO KNOW
ABOUT STARTING YOUR OWN APIARY
 Before you fully engage the process of bee keeping, there are a number of things you need to do to prepare for their arrival. Understanding what is needed, how to prepare, local codes that may affect you, the best time to start, etc. are all important. We discuss these and more with the following sections:
- Getting Started
- Check Your Local City Codes!
- Selecting your Apiary Location
- The Best Time to Start a Beehive: Spring
- Tools and Equipment Needs and Costs
- Buying Your Bees
- Maintenance: Checking on Your Bees
- Building Your Own Langstroth Beehive

GETTING STARTED
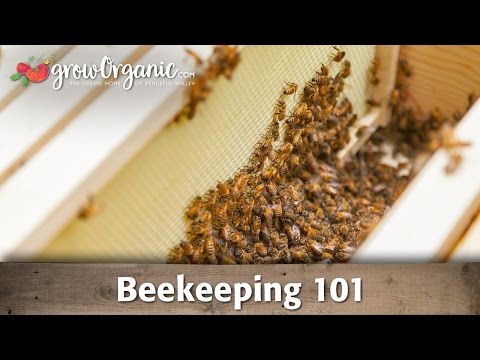
Just like when you buy a common house pet, you have to learn how to take care of your bees. You need to know everything they need in order to maintain their health. You also need to know everything you should for your own happiness as their caretaker. With this in mind, here are some of the best resources we’ve found to prepare you for your beekeeping adventure.
BOOKS
( Click here to be taken to the resources section below with pictures and prices )

- The Beekeeper’s Bible: Bees, Honey, Recipes & Other Home Uses by Richard Jones
- The Backyard Beekeeper: An Absolute Beginner’s Guide by Kim Flottum
- The Practical Beekeeper Volume I Beginning Beekeeping Naturally by Michael Bush
- Honeybee Democracy Hardcover by Thomas D. Seeley
- Beekeeping For Dummies by Howland Blackiston
- The Bee Book Hardcover by DK, Emma Tennant, Fergus Chadwick
- The Beekeeper’s Problem Solver: 100 Common Problems Explored and Explained by James E. Tew
- The Bees in Your Backyard: A Guide to North America’s Bees by Joseph S. Wilson
OTHER SUGGESTED RESOURCES
( Click here to be taken to the resources section below with articles and videos )

- Beekeeping magazines: The American Bee Journal or Bee Culture
- Your Local Beekeeping Association can also be of huge help. Find yours here: www.beeculture.com
- Check with your state/regional college or university for classes too
- The local library is another great resource
- Click here for our “Other Resources” section below
CHECK YOUR LOCAL CITY CODES!
Before beginning bee keeping in any residential area, be sure you know what the relevant laws, requirements, and regulations are. These laws can be local, county, and/or state laws. To learn them, you can contact your Local Beekeeping Association to speak with someone knowledgeable in your area or check directly with your township, county, and/or state/region.
Some areas don’t even allow beekeeping and other areas require a permit/license to be purchased. Here’s a list of possible regulations you’ll want to know about before setting up your first hive:
- Limits on the number of hives allowed
- Minimum amount of space allowed between your hive and the property line
- Any laws completely and expressly prohibiting beekeeping
- Residential limits that may have exceptions for public or private educational institutions, research facilities, garden clubs, etc.
- Beekeeping allowed but heavily regulated
- Other safety requirements

SELECTING YOUR APIARY LOCATION
Selecting your apiary location is an important part of beekeeping. The location you choose can affect the health of your bees, convenience of harvesting your honey, and safety for anyone who wants to avoid interacting with them. Here are some important points to consider when selecting your apiary location:
- Place close to flowers: While honeybees will travel up to 3 miles or more in search of food, they prefer to have it easily accessible. Within 300-500 yards of the hive is ideal. Placing your hives where there are lots of nectar and pollen-producing flowering plants will help with bee productivity and pollination. Also, there should be forage available to them in one form or another throughout the entire season, from early spring on through the fall.
- Position away from people: Choosing a discrete area away from foot traffic, recreation, and/or pet areas will help to make sure you aren’t disturbing your non-beekeeping neighbors.
- Consider bee flight paths: Ideally you will want to locate your hive where they have an open flight path with limited obstructions. Also, if needed, a high fence will raise their flight path. This can be helpful for directing them to avoid areas like neighbors, animal pens, etc.

- Consider natural disasters: Check your apiary is not in a flood-risk zone and consider fire hazards and other natural disasters too.
- Don’t overcrowd the area: If you can avoid it, don’t put your apiary too close to existing ones. Usually around 1.5-2 miles is a good distance to avoid competition. Use the resources above to find beekeepers in your region and talk to them. This will help you better locate your hives, save you time, and start you on your path to building a helpful network of beekeeping friends too.
- Face your hive(s) to the Southeast: South/Southeast exposure is the best option because it places the beehive entrances to catch the early morning sun and get them off to an earlier start.
- Make sure your hives are easily accessible: Year-round vehicle access is important to consider because it facilitates different operations such as feeding or harvest. Take this into account from the very beginning so as to avoid wanting to move your hives later.
- Provide a windbreak at the rear of the hive: Consider placing your hives alongside a shed, garage, or other building (separate from your home) so that colonies are protected from strong prevailing winds. This is especially important if you live in a climate where winter can send especially cold wind tastes.
- Make sure the hives have good ventilation: Just as it can be helpful to protect your hives from cold winds, it is also important to make sure your hives have good ventilation. Place them where winds can help this without being too strong.
- Choose a location that provides shade in the summer but not in the winter: It is helpful to give your hives afternoon shade in the summer and plenty of sun in the winter months. One easy way to help with this is to place your hives under a deciduous tree or on the east side of a building where the hive gets the warmth from the rising sun and shade in the afternoon.
- Bees should have access to water: Bees use water to reconstitute crystallized honey and to make bee-bread, the mixture of honey and pollen which they feed their developing larvae. If you don’t have a pond, stream, or other natural water source nearby, consider placing a bird bath or other water source near the hives.
- Protect your colonies from harmful pesticides: Industrial farmers use insecticides, herbicides, and fungicides that all affect the health of honeybees in one way or another. Even golf courses can pose a problem for your colonies. If you live near such a threat, consider seeking an alternative location for your apiary. There are many landowners, homesteaders, and/or small farmers who would be more than happy to have you set up your apiary on their property. Explore your options if pesticides are present around your area.
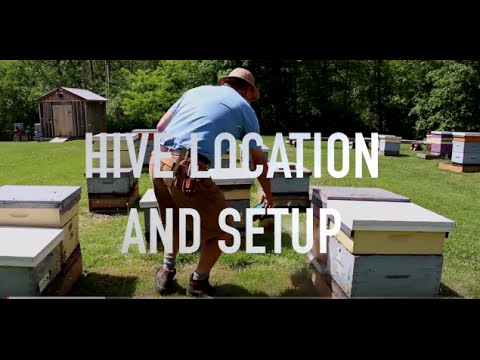
Here’s a hive location and setup video (5 minutes long) with some additional points too:

THE BEST TIME TO START A BEEHIVE: SPRING
 Once your hive is all set up you can buy bees and start beekeeping. It’s best to do it in the spring, when bees are just starting to get busy, when there will be plenty of food around for the new colony to establish itself. You want to start them up as soon as the weather warms up so that they will have plenty of time to build up a strong hive.
TOOLS AND EQUIPMENT NEEDS AND COSTS
It’s suggested that you buy all your apiary tools and equipment enough in advance to have time to familiarize yourself with everything and get it set up. Doing this in the fall will give you ample time and assure you are ready when your bees arrive, probably in early May, depending on the weather in your area.
Start with protective gear:
- A veil: This protects your head and face from bee stings and is the most important bee protection element to own.
- Gloves: Gloves are often used by beginners but more experienced beekeepers often do without them.
- Bee suit: This can be a one-piece or jacket and pants. A bee suit can protect your whole body from bee stings, but wearing full-length clothes is often enough. If you decide to only get one piece, get the jacket instead of the pants.
- Smoker: A smoker is the most used tool. Smoke interrupts the chemical pheromone signals that the bees use to communicate with one another and functions as a buffer to the honeybees’ natural pheromone alarm system. Without messages of danger spreading through the hive, the beekeeper can more easily go about the tasks of hive inspections, frame removals, splits and honey extractions.
- Hive tool: A hive tool is a small, crowbar-like implement that helps you break apart the boxes and pry up and remove the frames that make up your beehive. This is needed because they often get stuck together with beeswax and/or propolis. The hive tool can also be used to cut open honeycomb and/or squash unwanted intruders like hive beetles.
- Comb knife: A comb knife is used to uncap your honeycombs to release honey.
- Bee brush: A bee brush is a very soft bristled brush used to gently remove bees from frames, honey supers, etc.
- Frame grippers: Frame grippers help grip and remove the frames so extraction is easier. This is helpful to both the beekeeper and the bees.
- Honey extractor: The is basically a centrifuge that spins and extracts honey from honeycombs. It is helpful because it extracts the honey from the honeycomb without destroying the comb. A drum or container holds a frame basket which spins and flings the honey out while the wax comb stays intact within the frame so it can be reused by the bees.
Here is our cost analysis for all of this equipment. You can click the picture or THIS LINK to visit the spreadsheet with the most current details:

Open Source Apiary Tools and Equipment Cost Analysis ” Click to open the spreadsheet with the most current data
Next, buy (or make) your woodenware (hive components). It is advisable to start with new equipment. Old equipment may harbor diseases such as American Foulbrood which could infect your new bees. Here’s what you’ll need:
- Elevated hive stand: A hive stand isn’t necessary, but you may find one useful because it elevates the hive off the wet ground. This improves air circulation and will require you to do less bending over when you’re inspecting your hives. In addition, grass growing in front of the hive’s entrance can slow the bees’ ability to get in and out. The stand alleviates this problem by raising the hive above the grass.

- Bottom board: The basic hive set up starts with the bottom board. There are two different types of bottom boards, solid bottom boards and screened bottom boards.
Screened bottom boards give better ventilation and are helpful with mites. They look like this:

When the bees clean themselves and remove mites, they will fall straight through the hive and the screened bottom board. This is good because it keeps mites from piling up at the bottom of your hive and creating more work for you and your bees to clean and take care of. If you’d like to build your own, here is an image with measurements to assist you:

Solid bottom boards help keep your bees warmer during the cold winter months. Because they keep the bees warmer, you will find that it also encourages your bees to brood (reproduce) earlier and more in the spring. A solid bottom board can also be a solution to bees clumping/gathering under the hive. Some people also say that they have better results at treating mites with solid boards. This would be because there is nowhere for the mites to run. It also means that you have less of an area you need to treat for mites because they won’t fall under your hives.
If you live in a warmer climate with fire ants, solid bottom boards can help deter fire ants from gathering under your hive too. This is because the solid boards catch all of the hive debris and keep it from accumulating below the hive. This debris, if not cleaned up, will attract ants to your hives.
Here’s what a solid bottom board looks like:

They are cheap to buy and also cheap and easy to build, even cheaper and easier to buy/build than screened bottom boards.
- Entrance reducer: An entrance reducer is a cleat that limits bee access to the hive and controls ventilation and temperature during cooler months.

The entrance reducer has two different sized openings and the wooden piece can be turned so that only one the openings is used at a time. The advantages of reducing the entrance are: 1) reduces the amount of area that needs to be protected by the guard bees, thus making their jobs easier 2) hive robbers and other invasive species have a harder time accessing the smaller entrance and 3) helping to control the ventilation and temperature in the hive.
That said, a larger entrance provides more ventilation and gives the bees more space to fly in and out. So you may want to remove it when the honey flow is highest and/or during hot and humid times.
- Deep hive bodies: These are sometimes called a deep super, hive body, a deep, and/or hive chamber.

Deep hive bodies usually house the majority of the colony’s brood, drones, and reserves of honey and pollen. The deep hive bodies are essentially boxes that contain frames of comb. For a Langstroth hive, you typically build two deep hive bodies to stack on top of each other, like a two-story condo. The bees use the lower deep as the nursery or brood chamber where they raise thousands of baby bees. They use the upper deep as the pantry or food chamber, where they store most of the honey and pollen for their use. The standard and common size for a deep hive body is: 19 7/8″ in length, 16 1/4″ wide and 9 5/8″ in height.
- Honey super: The honey super is a box that holds the frames where the bees will store their honey. Beekeepers use honey supers to collect surplus honey.

The honey supers come in different sizes, usually medium (5 ¾” high) or shallow (6 ⦝” high). It is recommended to use a medium or shallow size super for honey, instead of a deep, because honey is very heavy and the supers can be hard to lift when full.
- Frames: These are frames that fit inside the honey super and they hold a “foundation” for the bees to build wax onto. Because the frames are removable from the hive, you can easily inspect, manipulate, and manage the colony with them.

If you are using a medium super for honey, you need 10 medium frames per box. If you are using a shallow super for honey, you need 10 shallow frames per box. The picture above shows a box with 10 frames. Inside the frame is the foundation and there are plenty of different foundation types. The most common are wired wax or plastic. Pick one type of foundation for the entire hive and stick with that to start out. Bees prefer wired wax over plastic, but many beekeepers prefer plastic due to its versatility and ability to stand up against wax moth devastation.
- Inner cover: This is a wooden shallow tray that goes on top of the uppermost super. It has an entrance hole to the outside and a ventilation hole in the center. It also has two sides ” one for the winter and one for the rest of the year.

- Outer cover: The outer cover protects the bees from the elements. Like the roof on a house, you will benefit from ensuring that it’s waterproof and also extend the life of the wood by covering the top with a weatherproof material like aluminum flashing, asphalt tiles, cedar shingles, etc.

It should be telescopic and fit over the inner cover with sides that hang down over the top super. This provides maximum protection and reduces the risk of rain seeping into the top super. Plywood is most suitable. In colder climates, a 2″ sheet of styrofoam can be sandwiched between thin sheets of plywood. While the overall thickness of the hive cover will increase somewhat, the hive cover will provide excellent insulation for the bees.
- Bees: The general consensus among beekeepers is that it is better to start with at least two hives as the bees will behave differently. This will increase the novice beekeepers learning curve in a positive way. We plan to start with six.

Here is our cost analysis for purchasing all these woodenware components and the bees. You can click the picture or THIS LINK to visit the spreadsheet with the most current details:

Open Source Apiary Setup Cost Analysis ” Click to open the spreadsheet with the most current data
BUYING YOUR BEES
There are many types of bee breeds available. Do your research so you can choose the right bees for your situation. Popular breeds include Carniolan, Russian, Italian, Buckfast, and mixed breeds. Their temperament, honey production, overwintering, and ability to fight off diseases and mites will vary by breed. Order your bees as soon as the bee suppliers start taking orders to make sure you get the bees you want.
The easiest way to buy bees is to purchase them locally. Talk to people in your area to find yourself a well-respected beekeeper and purchase your bees from them. You can also talk to local beekeepers about where they get their bees so that you can make sure to get quality bees. Buying bees on the internet is another option, but just be aware that you will not be able to inspect the bees before purchase. This means you could get a weak or really new hive.
For the more adventurous, you can also catch a swarm of bees in the wild and introduce them to your hive. These are bees that have outgrown their previous hive and are looking for a new home. Keep in mind though that swarms can typically only be caught in the spring and it takes skill and patience to populate a hive this way.

BEE PACKAGES
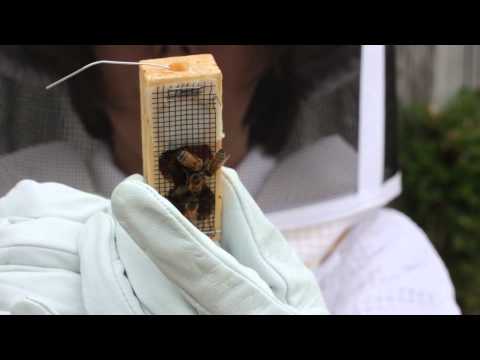
When purchasing your bees, you will find there are two main options. Bees can be purchased in either packages or nucs (short for nucleus). Packages include thousands of worker bees and one queen bee. When purchased this way, the bees are ready to be put to work in the hive and the package should come with basic instructions for getting them established. The summary of this process is to:
- Place the queen in the hive in the container she arrived in. Typically, she will come in a small box that has a small cover you remove. Under the cover she will still be blocked inside by a layer of “candy.” This candy will be removed by the worker bees over the course of several days, which will allow the queen and workers to get acclimated to each other.
- Once the queen is in place you can then introduce the rest of your bees. Gently tap the container of bees to loosen the clump of them. Then open the cover and pour the bees into the hive.
- Once the majority of the bees are in the hive between the frames, you then put the inner cover and the outer cover on the hive.
Here is a video:

BEE NUCS
Nucs are considered small hives usually comprised of five frames. In this case, the queen and her workers are already established and she will be laying eggs. In addition to the queen, your hive will include workers, nurse bees, and drones. There is also stored honey and nectar in the nuc.
- Nucs are very easy to install into larger hives.
- Once you arrive home with the nuc, the main hive is opened. The center five frames of the new hive are replaced with the frames in the nuc.
- The nuc frames are placed inside the new hive in the exact same order and direction as they were found in the nuc. The bees will now have more room and the colony will start to grow and expand.

MAINTENANCE: CHECKING ON YOUR BEES
Once you have your colony in place, it is important to keep an eye on how healthy your bees are. The amount you need to inspect the hives will change seasonally. They take more work in the spring and summer. These are their most active months and you should plan to check the hive(s) at least weekly. During their less active months though, fall and throughout winter, they take much less work and checking on them monthly should be sufficient.
When you check them, check for any damage to the main structure first. Next, inspect the frames and make sure that there are no other types of insects in the hive. Also check that the honeycombs are being formed properly.
As your colony grows, you will need to add more frames so that the colony can continue to expand. When the existing frames are almost full, you should add another box on top of the original box. In most cases, this new box filled with frames will be used to store honey and the older, lower box will be used more for reproduction.

BUILDING YOUR OWN LANGSTROTH HIVE
Here are construction details for a 10-frame Langstroth beehive. They were created by Barry Birkey. Here is the website and the direct PDF link.

Construction Details for 10 Frame Langstroth Beehive – Click for PDF Download
Most beekeepers will assemble pre-cut beehive equipment at some time. Others go farther by manufacturing their own equipment. In either case, it is important to use standard dimensions and assembly methods to ensure that the equipment will be interchangeable, strong, and durable.
The species of wood used to make a beehive can vary depending upon what is available in your area. Pine or cedar is usually recommended though, except for the top cover and floor of the bottom board which use ½” plywood. This is because plywood is less affected by changes in temperature and moisture.
All wood pieces must be flat. Small knots may be acceptable, provided they are not close to the edges or where handholds are to be cut. Box nails (1⦺” in.) are recommended for nailing supers, bottom boards, and covers.

The minimum thickness should not be less than ¾”. If you are using standard dimensional lumber, you can use 1×8 (¾” x 7¼”) for both shallow and medium super, and 1×12 ( ¾” x 11¼”) for the deep hive body.

Start cutting the boards to length. For fronts and backs, cut them slightly over 16 ¼”. For sides, cut slightly over 19 â¦Å¾Ã¢â’¬.

Trim to exact size before assembling. Cut box joints on all the board ends. Rabbet joints are an acceptable alternative. You can find detailed instruction for box and rabbet joints on websites like this box joint tutorial from PopularWoodworking.com or this one from StartWoodworking.com.
 Honey Super")
Now that you have the joint cut and the boards cut to finished size, cut the ⦝” x ⅜” rabbet on the 16 ¼” boards, stopping just short of the box joint pin at each end. Chisel these square after the boards are assembled and note detail of the frame rest at left.

Pre-drill holes for nails in each pin.

Assemble boxes with glue and nail each pin with a 6d galvanized nail. Attach 1×2 handholds with screws and glue. Attach metal rabbets on the frame rest notch. Fill any holes and paint all exterior surfaces, both top and bottom edges, with primer and finish top coat.
For more detailed instructions, check out this article: “Building a Langstroth Beehive.”

RESOURCES OF INTEREST
- Click here for OpenSourceBeehives.net – they are AMAZING
- Click here or a great page full of interesting bee facts
- Click here for BeehiveHero’s Page of Beekeeping Articles – A Wealth of Information
- How to create a pollinator-friendly habitat in your yard
- PDF on how to choose the site for your apiary
- Sun Hives: Prioritizing bees as pollinators first and honey makers second
- Article: “Raising Honeybees for Beginners”
- Article: DIY Beekeeping – Beekeeping Equipment
- Article: “Beekeeping ” an Essential Part of Permaculture”
- Article: “How To Get Started In Beekeeping In 7 Simple Steps”
- Article: “Types of Beehives and their Functions”
- DIY 10-frame Langstroth Beehive Construction Downloadable (PDF) Plans
- DIY Plans for Constructing a Warré Hive – “The People’s Hive”
- DIY Plans #1 for Constructing a Beehive PDF
- DIY Plans #2 for Constructing a Beehive PDF
- PDF Article: “Setting Up Your Apiary”
- Article: “Building a Langstroth Beehive”
- Article: “How To Set Up Your First Beehive”
- Article: “How to Keep Bees”
- Article: “How to Pick the Ideal Apiary Location”
- Article: “The Parts of a Beehive”
- Article: “Beginner Beekeeper’s Guide”
- Article: “A Quick Guide to Starting a Beehive”
- Article: “Start a Back Yard Honey Bee Hive”
- Article: “Beeswax Rendering”
- Article: “Why Should I Teach My Child About Bees?”
- Article: “Honeybees Suffer Unnecessarily in Human-Made Hives, Study Finds”
- Paul Wheaton’s “Vanishing of the Bees Movie Review” Podcast | Trailer
- Paul Wheaton Podcast: Benefits of WILD bee genetics and building wild bee traps
- Paul Wheaton Podcasts: Keen on Mason Bees with Dave Hunter | Mason Bees Part 2
- HoneyBeesOnline.com – A provider of online beekeeping courses, equipment, and more
Here is a short (6 min) apiary setup video:
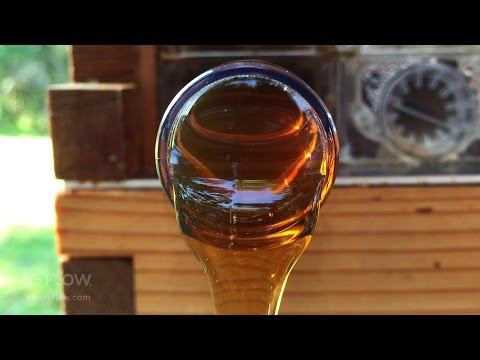
Here’s an idea for collecting honey without disturbing the hive :
Books we’d recommend from Amazon (paid links*):
*As an Amazon Associate, One Community earns from qualifying purchases.
OPEN SOURCE CONTENT TO BE ADDED LATER
A huge additional volume of open source information will be added to this page as we setup and maintain the One Community apiary infrastructure. We will also update the cost details with the exact numbers from our purchase. Open source resources that will be added to this page as we build include:
- Step-by-step video instructions for hive assembly
- Timelapse and instructional videos detailing hive evolution
- On-going results of our honey and wax harvesting experience
- On-going results of our experience maintaining and evolving our apiary
- Instructional videos and recipes including every way we use honey and wax
SUMMARY
We consider an apiary as part of the one Community food infrastructure and our botanical garden model . Due to declining bee populations and the volume and diversity of food we will be growing (and teaching others to grow), we consider an apiary as an essential component of our sustainable teacher/demonstration communities, villages, and cities model . Our goal is to open source and free-share as much information as possible about setting up and maintaining an apiary so we can help promote community-sponsored rebuilding of the bee population, produce honey and wax on the property, and maintain the necessary density of pollinators to support our food supply.
FREQUENTLY ANSWERED QUESTIONS
Q: What is One Community’s stance on pesticides, herbicides, and fungicides?
If it is not safe to eat, we will not be spraying it on our food.
![]()