Plaster
This page will develop indefinitely as an open source plaster resource. The goal of this page is to discuss natural and traditional plasters with the intent to open source share our research and collaboration for identifying the best options for balancing breathability with durability for long-lasting water proofing in do-it-yourself eco-home building situations like the Earthbag Village (Pod 1) and Straw Bale Village (Pod 2). The first major evolution of this tutorial will be with the 3-dome cluster as part of our crowdfunding campaign, we’ll then further evolve it with the complete Earthbag Village (Pod 1) and Duplicable City Center®, and then the other 6 villages.
This page is divided into the following sections:
RELATED PAGES (click icons for complete pages)
WAYS TO CONTRIBUTE TO EVOLVING THIS SUSTAINABILITY COMPONENT WITH US
SUGGESTIONS ● CONSULTING ● MEMBERSHIP ● OTHER OPTIONS
CLICK THESE ICONS TO JOIN US THROUGH SOCIAL MEDIA
KEY CONSULTANTS TO THIS OPEN SOURCE PLASTER RESOURCE
Amira Kessem: Mechanical Engineering Student in Israel
Scott Howard: Sustainable Building Expert and Owner of Earthen Hand Natural Building
WHY ANALYZE PLASTER
In non-traditional home building with ultra-eco building materials and designs that don’t include a typical roof, protecting the walls of the structure can present unique challenges. Balancing durability, breathability, affordability, and ease of use and acquisition with desires for sustainability and eco-friendliness is something we’ve researched extensively as part of our Highest Good lifestyle considerations and plans for construction of the 7 different sustainable village models.
TYPES OF PLASTER
There are a broad diversity of traditional plaster types and methods as well as many eco alternatives. Here are the options we’ve researched so far. There are complete websites dedicated to plasters, so we’ve focused on the basics here plus where it can be purchased and the cost per unity of measure. Click the names below to be taken to the specifics on this page:
- Gypsum Plaster (Plaster of Paris)
- Lime Plaster
- Portland Cement Plaster (Stucco)
- Clay Plaster
- Other Plasters
Click here for an extremely informative PDF about the history of lath and plaster
GYPSUM PLASTER (plaster of Paris)
 Gypsum plaster is a plaster that is fire proof, doesn’t emit any kind of chemical vapors, and is easy to make with an over-the-counter just-add-water mix that is widely available. It is a crystalline combination of calcium sulphate which is mined all over the world, and is also a synthetic by-product of major industries such as fossil-fuelled power stations. Gypsum plaster has very good insulation properties for both thermal (R-Value of .6 to .9 per inch) and acoustic. It is also moisture-resistant and impact-resistance. The big problem with gypsum plaster is that it is non-breathable, so it is not recommended for external use in damp situations.
Where it can be purchased:
- Gyproc http://www.gyproc.ie/ [Dublin, Irland]
- National Gypsum http://www.nationalgypsum.com/index.htm [Charlotte, North Carolina]
- Lowe’s http://www.lowes.com/ [local]
- Home Depot http://www.homedepot.com/ [local]
Cost per unit of measure:
- 25-lb Plaster of Paris – $15.98.
- 4-lb Plaster of Paris – $6.78
- 1-gal. Flat Venetian Plaster – $35.98.
- 25 lb. White Plaster of Paris Dry Mix – $15.98.
Learn More about Gypsum Plaster Here
LIME PLASTER
 Lime plaster is breathable, readily available, and eco-friendly. Downsides are that it can be hard to apply evenly and it can burn your skin, so use gloves and long sleeves and lots of protection. It is best applied in thin coats, so don’t use it to fill in big gaps, but first shape the wall exactly as you want it to look. Every 4 or 5 years lime plaster will need a thin coat of limewash to maintain its strength. R-Value is about .2 per inch.
Where it can be purchased:
- Lowe’s http://www.lowes.com/ [local]
- Home Depot http://www.homedepot.com/ [local]
- Earth Pigments: http://www.earthpigments.com/ [Cortaro, AZ]
- Menards: http://www.menards.com/main/home.html [local]
Cost per unit of measure:
- Hydrated Lime Type S – $2.95 for 112g or $16.95 for 1kilo
- QUIKRETE 50-lb Hydrated Lime – $11.41
- Carmeuse Type S Miracle Morta-Lok Masons Hydrated Lime – 50-lbs – $9.89
Learn More about Lime Plaster Here | Also Here | This PDF | See Below Too
PORTLAND CEMENT PLASTER (stucco)
 Stucco is a readily available, very durable, and breathable finish material with a typical life span of 50-80 years or more. Downsides are a significant carbon footprint and a rigidity that lead to cracking and a regular need for inspection and patching in areas where any shifting of the structure can be expected. It’s R-Value is .2 per inch and it works better in dry climates than very wet climates. Cement plaster is applied in three coats: scratch coat, brown coat, and finish coat.
The ingredients for the first and second coats of cement plaster are water, sand, and one of the following options:
- Portland cement and type S hydrated lime
- Portland cement and plastic cement (or masonry cement)
- Plastic cement. (or masonry cement)
Ingredients for first two coats (each in different proportions) are:
- Plastic cement
- Sand (Plaster sand such as Oly #2, not concrete sand or masonry sand.)
- Water
Or:
- Regular cement
- Hydrated lime (Flintkote Type S lime)
- Sand
- Water
Or:
- Regular cement
- Plastic cement
- Sand
- Water
The third coat should use a premixed cement plaster powder.
Where it can be purchased:
- Lowe’s http://www.lowes.com/ [local] → cement plaster mix, Portland cement powder
- Home Depot http://www.homedepot.com/ [local] → cement plaster mix, Portland cement powder
- http://www.isomat.eu/ isomat [Athanasios, Greece] → cement plaster mix
- http://arroyobuildingmaterials.net/cement/ Arroyo Building Materials [San Fernando, CA] → Portland cement powder, plastic cement
- http://www.sepulveda.com/ Sepulveda Building Materials [5 locations in southern California] → Portland cement powder, plastic cement
Cost per unit of measure:
- Portland cement: 94 lb. Portland Cement – $9.45 at Home Depot
- Stucco mix: 50 lb. Stucco Mix – $13.68 at Home Depot
Learn More on the Pros and Cons of Stucco Here
CLAY PLASTER
 Clay plaster is partially free if you have clay on your property, super eco-friendly, breathable, and relatively easy to acquire even it it isn’t available on your property. The finishes of clay plaster are especially beautiful and clay plaster (and all earthen plasters) breathes especially well. Downsides are that it is not as durable when used externally and will require regular maintenance. To make clay plaster you mix clay, sand, and a fibrous additive like chopped straw. It’s R-Value is around .2 per inch.
Where it can be purchased:
- Dig it yourself
- Speciality building supply stores
- Green Building Supply Online: http://www.greenbuildingsupply.com/
Cost per unit of measure:
- Dig it yourself: free
- Specialty building supply stores: as low as $8.00/50 lb bag
- Online: as high as $75.00/50 lb bag plus shipping
Learn More about Clay Plaster Here
OTHER PLASTERS
There are also acrylic plasters, silicone plasters, and silicate plasters. These plasters are durable and flexible. Downsides are that they are not breathable, more expensive and harder to acquire, and generally not considered eco-friendly.
Where they can be purchased:
- Acrylic plasters, silicone plasters, and silicate plasters: http://www.isomat.eu/ [Athanasios, Greece]
- Tadelakt Lime Plaster: http://amzn.to/2wWnxJC (US) – DIY options in the Resources section below
- Acrylic Plaster: http://omega-products.com/acrylic-finishes/ (US)
This water proofing method is the one recommended by Cal Earth:
- Stabilized rough plaster layer applied on earthbags
- Low VOC asphalt emulsion applied on top of rough plaster
- 16”x16” earthbag pieces soaked in low VOC asphalt emulsion is layered on top of layer 2, with overlaps in a pine cone pattern
- Fine plaster cover is applied on top of previous layers
- Five lime paint layers are applied on top of fine plaster
MAKING ECO-PLASTER
Here is an an eco-plaster exploration compliments of Scott Howard, Sustainable Building Expert and Owner of Earthen Hand Natural Building.
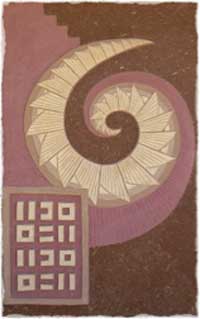 There are limitless possibilities using only natural materials to create plasters and/or paints. Natural materials can include, but are not limited to: clay, sand, various binders, various fibers, borax, water-glass, earth pigments, oils, waxes, and natural lime. These can be made to the consistency of anything from very pasty plaster or runny paint. They can be applied indoors or outdoors. These may be of any multitude of colors or textures, and can be applied over a wide variety of surfaces with proper preparation.
The possibilities are too many to list here, so we will instead focus on the areas where natural finishes reach certain limitations and the different ways to address these. The limitations are primarily:
- Durability to Weather
- Mechanical Durability
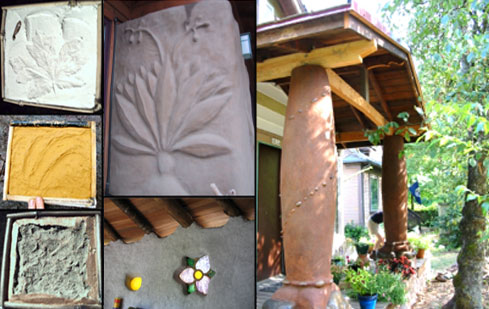
Limitless Possibilities for Artistic and Functional Application
When water touches clay-based substances, a tiny amount of clay dissolves into the water and is washed away. This can be overcome by the addition of surface or mix-in stabilization, but to make it completely waterproof using only natural materials is rare, and requires much maintenance.
Achieving greater durability to mechanical wear is another challenge for earthen surfaces. Earthen floors can be oiled many times to achieve durability. Additionally, they can be tamped. The addition of lime (or other stabilizers) also helps overall durability. Plasters and paints are similar to floors in that greater durability is achieved through burnishing and/or stabilization.
 |
Experimenting is the key. As many methods that are known, there are more still to be tried out. To help with the exploration and experimentation process for achieving a durable and beautiful finish, we’ll explore the following key concepts:
|
ADHESION/BINDER STRENGTH
Perhaps the most important consideration is getting the material to adequately adhere to the substrate over time. For example, natural finishes cannot be placed next to impervious surfaces like plastic, metal, or glass. Natural finishes breathe, and therefore can’t grip onto things that don’t. Attempts can be made to apply natural finishes over smooth or non-breathing substrates, but this will require using non-natural materials. An example is latex or acrylic paint mixed with sand used as an adhesion coat. Some natural surfaces like smooth wood can also pose a challenge for natural plasters to grip.
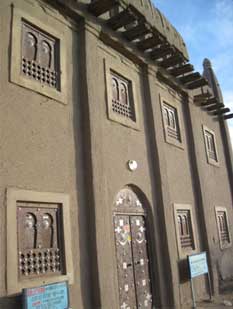 An all natural adhesion coat can be made with a sticky clay slip mixed with sand and painted on. Proportions can vary, but experiments can start with 1 part clay to 1 part sand. Another great binder is wheat paste, which can be used to create an excellent adhesion layer in the exact same manner as described with the clay slip. Wherever wheat paste is used, use some borax to prevent spoilage (1 tablespoon per 2-3 gallons when using 10 molar borax). To make wheat paste, use bleached, non-enriched flour, a bowl, a hot plate, a whisk, and a wooden spoon with a flat end. Combine 1 part cold water and 1 part flour in the bowl with the whisk, adding only a little flour at a time. Meanwhile, bring another 1 part water to a boil.
Once you have the very beginning of a boil, pour in the flour/water mix while whisking it in vigorously. Reduce heat immediately and stir every minute or two for about 15 minutes or until the mix reaches a yogurt-like texture. Be very careful not to create lumps or you will have to screen them out later. Be sure to use the spoon to scrape the bottom every time you stir, if you let it burn it will be lumpy and unusable. Set it aside to cool before use. Add borax to any mixture with the paste, using a ratio of approximately 1:30, borax:paste. This can be mixed with mason sand at a ratio of 1:3 or 4, paste:sand, and brushed onto smooth surfaces to create the adhesion layer.
PARTICLE SIZE/LAYER THICKNESS
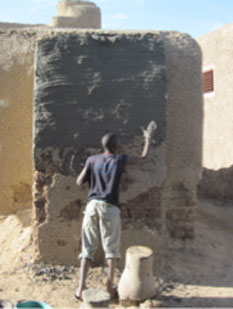 Particle size is related to plaster thickness. First, sort all materials to the same particle size that you desire for the layer being added. Scott uses ¼”, ⅛”, 1/16”, and occasionally 1/32″ or 1/64″ screens to sort out larger particles.
This is ideally achieved dry. Moist clay can however still be strained by mixing it thoroughly into a slip using a mixing drill. It should have the consistency of runny yogurt in order to get it to pass through the screen, then you can shake the screen and/or push materials through with your hands.
Base layers are typically ⅜” to ¾” thickness, and therefore can accept particles of up to ¼” size. Smaller particles must be present to allow larger ones to function in the mix. This is a concept that applies to any layer. In other words, scratch (intermediate) coats which are typically 1/2″-1/8″ thickness, should contain particles of no greater size than half that of the layer’s thickness.
BINDER + PARTICLE BALANCE
Particle to binder ratios are also essential. Normally, plasters contain between 60% and 85% particles, with the remainder being binders. Particles also include fibers, which are usually most effective at sizes between 1″ and 1/16″ long. The exact recipe is something you may only be able to attain with experience because it depends entirely on the “feel” of the plaster. Factors include how active the clay may be, the size of the particles, how much of the former may be sand or fiber, and the particular application or end goal. As particle size decreases, usually a higher percentage of them is required, especially when sands can be as fine as powder.
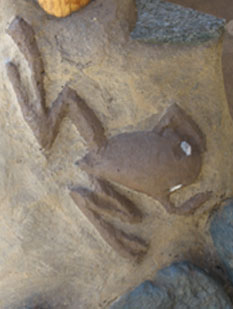 When creating thin finish layers, such as an earthen paint, one common recipe is 1/3 part powdered silica (various sizes combined in this portion is ideal), 1/3 part clay, and 1/3 part wheat paste. Other additions are small amounts of borax, sodium silicate, and pigments. So in earthen paints that go on at about a 1/16″ thickness (they can applied by brush or trowel) the amounts are more like 65% binder and 35% sand. Higher percentages of fine sands can definitely be used, especially if they are smaller than a 200 mesh size. The higher amount of binder in this case is what aids the paint in sticking well and not “dusting”, i.e. coming off too easily. This type of finish layer goes on last, creating a very smooth surface. Although rich in binders, they won’t crack when they are applied in the appropriate thickness. Paints thicker than 1/16″ will likely crack and should be thought of as plasters, and follow those guidelines.
AVOIDING DECOMPOSITION
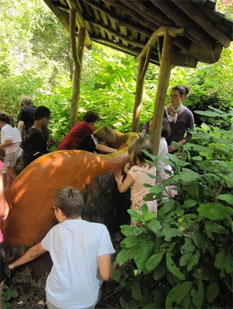 To avoid decomposition, any natural finish should leave out organic matter like plants or bugs. The reason straw or other fibers can last a very long time is due to both a high silica content that makes them break down very slowly without the presence of water, plus things surrounded by clay tend to have all moisture continually sucked out of them which prevents biological activity. The addition of borax helps any earthen mixture remain in a more permanent state, and will assist any fibers or biodegradable binders such as wheat paste from changing too quickly. The addition of borax helps any earthen mixture resist decay, and will help any fibers or biodegradable binders (eg wheat paste) not break down.
WATER RESISTANCE
Without using synthetic materials, it is challenging to achieve total waterproofness. In order to make earthen plasters and paints more water resistant, several strategies may be used. Binders like linseed, walnut, palm, or tongue oil, or sodium silicate (aka potassium silicate, aka waterglass) may be painted on final finish surfaces, and/or added in small amounts to the entire mix of one or more layers.
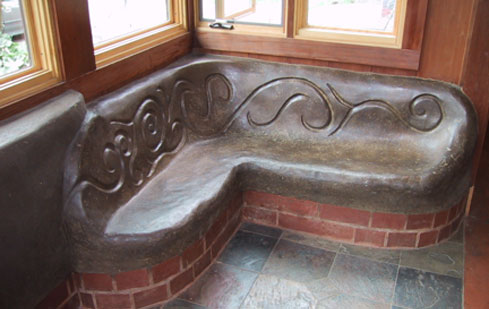
A Bench Made From Earthen Plaster and Naturally Sealed
Also, burnishing with steel trowels or smooth stones can mechanically align and compress the surface to close up pores and slow down absorption. Both of these strategies can be combined to create a burnished and stabilized surface that will likely out perform most anything else.
Tadelakt is an ancient lime plastering method that combines the chemical stabilization of lime with thorough burnishing, as well as an oil/soap treatment to the final surface that seals all pores. Such a surface, if properly maintained, can remain totally waterproof indefinitely.
Other similar methods exist that use only clay binders and linseed oil in many layers to build up a waterproof ‘linoleum.’ However, these methods are arguably out performed by the application of a shingled covering like wood, ceramic, or rock. The addition of these extra surface materials takes more time but is longer-lasting with less maintenance needed. Earthen materials can also be compressed to such an extent that they become nearly waterproof. Compressed earth blocks, for example, can resist rain on the vertical surface for a great number of years before eroding to the point that they even show wear. Depending on the amount of water exposure, it may take many decades before water would cause them to fail structurally.
PIGMENTATION
When using pigments, an even color is possible only by first mixing the pigment powder thoroughly with a few drops of water until there are no lumps. Iron oxides are the least toxic or expensive to use. Red(pink), yellow, and black (blue/grayish) when combined in various ways can yield green, orange, purple, maroon, etc. when trying to achieve more intense color, add the highest amount of pigment the plaster or paint can take. This is based on weight, rather than volume. It’s about 1 kg of pigment per 4 gallons of plaster or paint.
APPLICATION METHOD
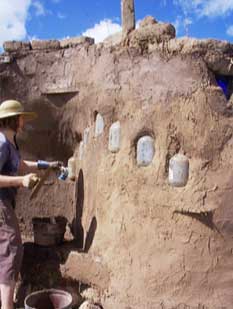 When applying base or scratch coats, it is possible to work in any direction out from the completed work. However, working from top to bottom is usually the most effective because you don’t have to keep touching completed sections or inadvertently re-wetting them. For finish layers, working in this pattern is essential. Different natural plasters and paints are also applicable with hands, yogurt lid trowels (with rims cut off), or steel finish trowels. Like most everything else with natural plasters, the key is experimentation and finding the tool and approach that works best for you and your specific situation.
WHEAT PASTE AS AN ADDITIVE
Something else amazing we use at Earthen Hand Natural Building is wheat paste. It can be use to stabilize many types of adobe mixtures including earth paints, finish plasters, base coats, poured adobe floors, and more. It’s also commonly used to glue on wallpaper. It can resist erosion for many years when mixed with a well-graded sand and used as a finish plaster between 1/8 inch and 3/8-inch thickness. Try it out and you’ll see it’s hard enough that you can’t scratch it with a fingernail, and water runs off of it like a ducks back. Adding a layer of oil after the plaster is dry will increase the surface’s water resistance. Overall, this is a very effective and affordable option for increasing hardness and water resistance for natural finishes.
HOW TO MAKE WHEAT PASTE
You may think twice about eating flour after you make this glue with it. Here’s what Scott Howard uses to make it:
- Clean mixing bucket
- One handed sieve
- Whisk
- Big utility cooking pot
- Big wooden spatula with a straight wide end
- Burner that can adjust to a low setting
- Non-enriched flour
- Water
- Scrubby sponge for clean up.
Start by putting 1 part water onto the burner on high, with plenty of space left in the pot. Then mix 1 part cold water with 1/2 part flour in the bucket. Use the whisk and sieve simultaneously to mix while avoiding clumps. Fast whisking for a few minutes or using a mixing drill for a minute can help to prevent lumps. If lumpy, you can screen them out as you pour out of the bucket into the pot. If not lumpy, good job, pat yourself on the back for doing such a great mixing job.
Turn burner down to low and pour it into the pot of heated water, stirring constantly while combining the hot and cold liquids. Keep stirring for a minute. Stir again for approximately 10 seconds every minute or two for about 20 minutes or more. Your goal is to keep the goo from building up on the bottom. I repeat, do NOT let it burn on the bottom. If you do, you might be able to screen out the chunks or leave the burned part on the bottom, or just start over and get it right the second time if you need clean paste. When hot it will be like gravy. Once cooled, it will thicken to a paste the consistency of firm yogurt. Do not try to work with the past until it is mostly cooled because it is notorious for burning people because it’s hotter than you think it is and it sticks to skin. Try at your own risk, and please use your own judgement and exercise caution with burning hot pastes.
Once cooled, mix in about 1/4 – 1/2 cups of 10 molar borax powder for every gallon of paste. Paste can be stored for a few weeks or more in the freezer, a few days in the fridge, or should be used within a day or two with no refrigeration. Note: if you leave it out too long it will smell very bad. Fortunately, it’s very inexpensive and compostable. Any earthen layer thicker than 1/2 inch that uses any significant amount of wheat paste may not dry easily, so give it extra time or help dry it out as needed.
RESOURCES
- Scott Howard’s workshops and natural paints video
- An excellent resource covering how to build an earthen floor
- An article about what lime is and how it is made
- A video discussing and showing lime plastering a cob oven
- A video showing making homemade lime plaster and putting it on an earthbag structure
- A practical guide to rendering and plastering with lime
- The Art and Science of Natural Plasters (Summary and Download): Part 1 | Part 2 | Buy Video
- Q&A Page on Plastering or Waterproofing Cob
CLICK HERE TO SUGGEST A RESOURCE
SUMMARY
Natural plasters can be made that are as effective as non-natural alternatives but the process is as much an art as it is a skill. Because natural plasters are made from local materials, the process of creating them is always slightly different and experimentation is necessary. The more skill and experience a person has when entering the experimentation process, the more effective and efficient it will predictably be. Depending on your timeline and willingness to explore and engage the process, however, it can definitely be worth it. If not, the more traditional alternatives can be summarized like this:
- Gypsum plaster isn’t breathable
- Cement plaster has a significant carbon footprint
- Clay plaster requires annual maintenance
- Lime seems like the best bet. Its only drawback is it being a dangerous material to work with
FREQUENTLY ANSWERED QUESTIONS
CLICK HERE TO ASK A QUESTION OR MAKE A SUGGESTION
Open source DIY plaster videos will also be part of One Community’s upcoming crowdfunding campaign:
VIDEOS COMING: DO-IT-YOURSELF PLASTER HOW-TO
SEE OUR HOW TO HELP AND/OR CROWDFUNDING CAMPAIGN PAGE TO HELP US GET TO CREATING ALL THE TUTORIAL VIDEOS EVEN FASTER
 One Community






Connect with One Community